
RECOVERED RECIPE (Sourdough Pullman Loaf, originally posted April 2, 2024) –
As many of you know, I lost the prior eleven months of melinmac cooks posts in September 2024, and I’m now trying to rebuild what I’ve lost. This is one of those posts. Luckily I saved all of the pictures on my hard drive, but the content of the lost posts, including recipes, were not recoverable. At this point I’m not trying to recreate anything more than the recipes with pictures. Hopefully I’ll build it all back over time. Thanks for being here!
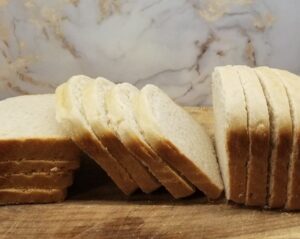
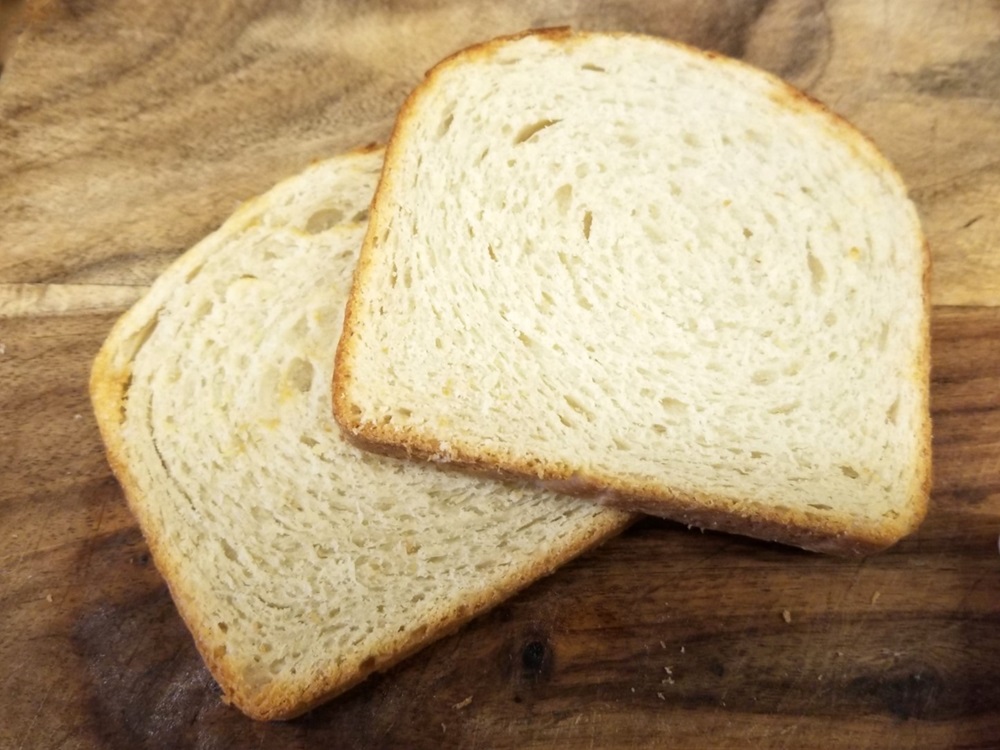
Sourdough Pullman Loaf
Equipment
- stand mixer
- Pullman loaf pan with lid
- bread slicing guide (not necessary, but nice to have)
Ingredients
- 4 T butter (1/2 stick)
- 100 g active starter (100 % hydration)
- 350 g King Arthur Gluten Free All-Purpose Flour
- 1 t salt
- 2 T sugar
- ⅔ cup milk
- 100 ml water
Instructions
DAY 1 (morning)
- Feed your starter – Add equal parts flour and water to your starter and stash it in a warm place.
DAY 1 (afternoon)
- Cube the butter – Cut the butter into small cubes. Set aside.
- Mix, rest, and form the dough – Place the bowl of your stand mixer on your digital (set to grams) scale and tare out. Add the starter, then tare out again, and add the flour. Add the rest of the ingredients to the bowl except the water and butter. Start mixing (using the dough hook), and slowly pour in the water. Once the flour is fully hydrated, add the butter, one cube at a time , until complete incorporated. Cover the bowl, and let the dough rest for 15-20 minutes. Once rested, scrape down the sides of the bowl and mix on medium until the dough pulls away from the sides. Lightly flour your work surface with sorghum flour. Pull the dough out of the bowl and stretch, fold, and knead the dough until the dough is very smooth and not at all sticky.
- Bulk fermentation – Form the dough into a ball and let it rest in a warm spot in a covered bowl for 4-5 hours.
- Cold fermentation – Punch down the ball, reshape it, and place it back in the bowl. Let it rest in the refrigerator overnight.
DAY 2
- Form loaf – Lightly flour your work surface and spray the inside of the loaf pan and lid with olive oil. Roll out the dough (using a rolling pin) in a long rectangle the width of the loaf pan. Tightly roll the rectangle of dough like a jelly roll, and pinch the ends. Place the dough seam side down in the pan. It should be a snug fit.
- Final rise – Cover the pan and put it in a warm place for the final rise. This can take anywhere from 4 hours to 12. Preheat your oven to 375℉ toward the end of this final rise.
- Bake – Bake in the covered loaf pan for 20 minutes. Uncover and reduce the oven temperature to 350℉ and bake for another 25 minutes, or until the internal temperature is at least 200°.
- Cool Completely – Remove from the oven and tilt the loaf out of the pan onto a wire rack. Let cook completely before slicing.

If you’d like to be notified when new posts are added to this site, please subscribe below, and be sure to click through on the email you receive to confirm your subscription. If you don’t receive a confirmation email, please check your spam folder.